Moto G Plus 5 Not Reading Sim Card
GETTING STARTED
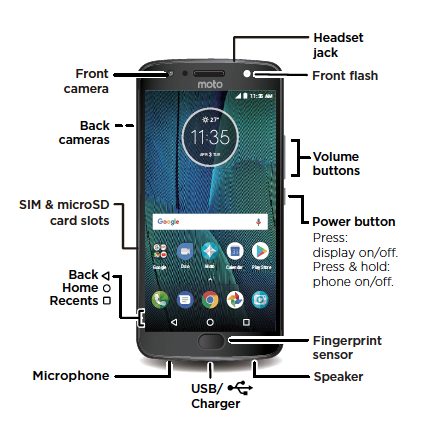
First expect – Moto G5S Plus
Let's get started.
We'll guide you through startup and tell you a bit about your telephone's features.
Note: software updates happen oftentimes, then your telephone may look a little different.
Tips & tricks
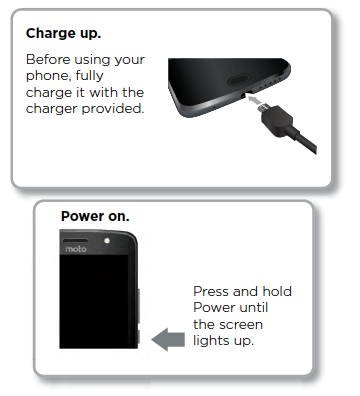
Start: insert the SIM card or cards in your phone and accuse up. So power on and follow the screen prompts to set your telephone.
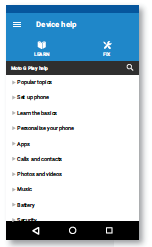
Assistance: all your questions about your new telephone answered right on your phone. Watch a tutorial. Read a how-to. Find out anything nigh your telephone.
Notice it: Swipe up and open up the app ? Device Help.
Annotation: certain apps and features may not exist available in all countries.
Start
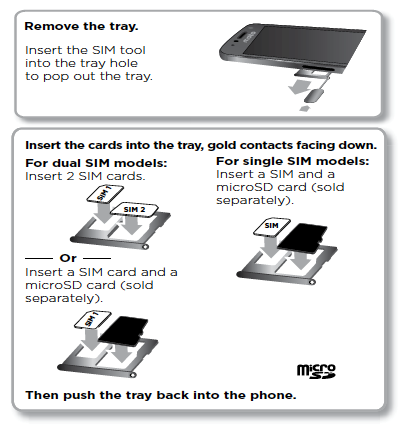
Put in the cards
Your telephone might support using two SIM cards. To insert your Nano SIM card(s) or an optional microSD memory card, follow these instructions.
Caution: brand certain yous use the right size SIM card and don't cut the SIM menu. Don't use tools to remove the battery – doing so may damage your telephone.
Ability on
Accuse your phone fully and turn the power on. Then select your language and follow the screen prompts to become started.
Accessibility Options
Android devices offer exceptional built-in accessibility options and 3rd-party accessibility applications. RAZ Mobility has an extensive section dedicated to accessibility. Read more >>>
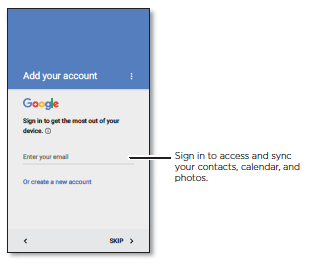
Sign in
Subsequently you lot power on, just follow the screen prompts to get started.
If y'all use Gmail™, yous already have a Google™ account – if non, you can create an business relationship during setup. Signing in to your Google business relationship lets you lot access, sync and support your stuff. See your Google apps, contacts, calendar, photos and more.
Tips and tricks
Wi-Fi network: for faster Internet access or to conserve mobile data use, swipe the status bar downwardly with 2 fingers, then tap > Wi-Fi.
Accounts: to add, edit or delete accounts, swipe up > Settings > Accounts. To ready electronic mail accounts, run across "Email".
For help with your Google account, visit www.google.com/accounts.
Annotation: this phone supports apps and services that may employ a lot of data, so brand sure your data plan meets your needs. Contact your service provider for details.
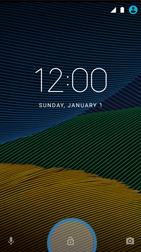
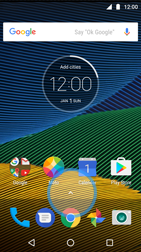
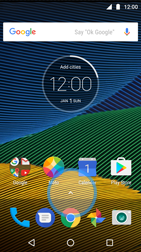
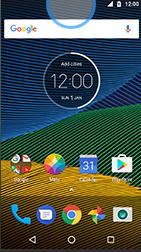
Quick start: Home screen & apps
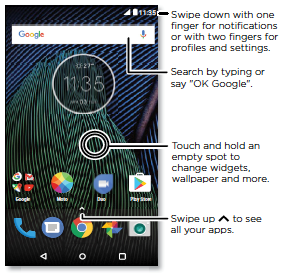
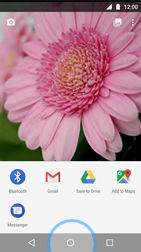
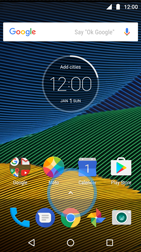
The Dwelling house screen is what you see when yous turn on your phone. From here you can explore apps and more.
Note: software updates happen frequently, so your screen may look a footling different.
Tips and tricks
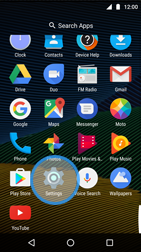
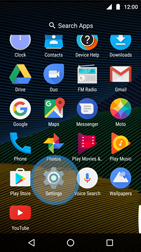
Open app listing: swipe up, then swipe upwards to scroll through apps.
Return: to return to the Home screen from whatever location, tap Habitation. If One-button nav is turned on, tap the fingerprint sensor to render Abode.
Pages: to add a page, drag an app to the right side of the screen until y'all see a white bar. You can add multiple pages. To meet other pages of shortcuts and widgets (if available), swipe the Abode screen left.
Settings: to quickly open common settings, swipe the status bar downward with ii fingers. To open up more settings, tap.
Shortcuts: swipe upwardly, bear on and hold an app, then elevate it to one of your Domicile screen pages. To run into all your apps, swipe upwards.
Apps: to remove an app from a Home screen page, touch and hold the app, so elevate it to Remove. (The app isn't removed from your telephone, merely the Dwelling screen.)
To uninstall apps from your Home screen, touch on and concord the app, and so elevate information technology to Uninstall. (Yous tin can't uninstall some apps.)
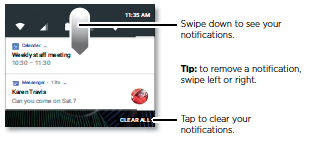
Status & notifications
At the top of the screen, icons on the left notify y'all nearly new letters or events. If you don't know what an icon means, swipe the status bar down for details.
Tip: getting too many notifications? Affect and hold a notification to see which app is sending them to y'all. Then you tin can plough them off.
Icons at the summit right of the screen tell you almost phone status:
![]()
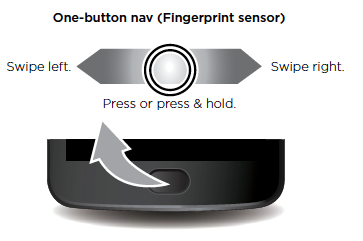
Control with one affect
Lock and unlock your phone, navigate your phone and more with just 1 touch.
Discover it:  Moto > Moto Actions > One-push button nav
Activating One-button nav will remove the Dorsum  , Habitation
  , and Recent
  buttons from your screen. You will navigate your telephone using the fingerprint sensor instead.
To navigate using the fingerprint sensor, employ these gestures:
- Home: tap quickly on the fingerprint sensor to go to your Home screen.
- Back: swipe correct to left on the sensor to go back to the previous screen.
- Recents: swipe left to right on the sensor to view contempo apps.
- Lock: printing the sensor until yous feel a short vibration and so release to lock the screen.
- Google: touch and agree the sensor until you feel a longer vibration to actuate the Google Assistant.
TUTORIALS
SD Card
Insert SD Carte
Whether its images, music, videos or applications we know that the most important stuff on people's phones is stored in the user retention. The Moto G (5th Gen.) allows you to expand your retentiveness by using a micro SD card.
To insert a memory card:
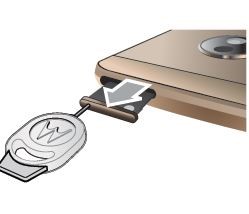
one. With the phone facing down, insert the SIM tool into the tray pigsty to pop out the tray.
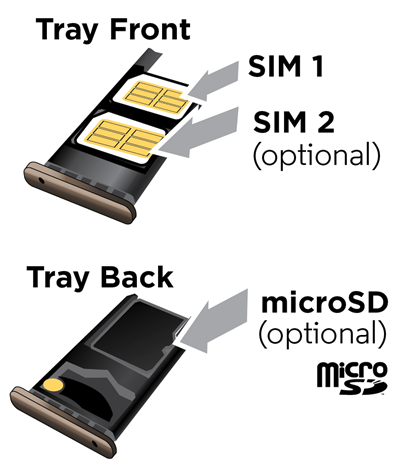
2. Put in the SIM card with the golden contacts facing upwardly. Put in an optional microSD card on the tray's back with the gilded contacts facing downward.
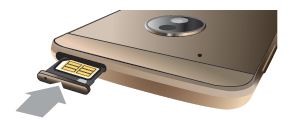
3. Push button the tray back into your phone.
When you insert an SD menu for the starting time time, you can choose to either utilize the card equally Portable Storage or Internal Storage.
| Portable Storage | Internal Storage |
| Select this mode if yous oft swap your SD carte betwixt devices, utilize your SD carte for media storage only. | Select this mode if you lot desire to completely extend your device storage with the menu, and need the card to shop big applications, games, and their information. |
| You accept a Class 2, 4, or 6 bill of fare. | You have a loftier-speed card (UHS-1) |
| If you lot frequently swap cards, use SD carte to transfer content between devices and do not download many large app, we recommend configuring your card as "portable". | If you want to store large games on the card, if your device storage is always filling up, and yous programme to always keep this carte du jour in the device, we recommend keeping your card as internal. |
| Only pictures and media can be stored on the card. Downloaded applications, their data, is always internal. They tin non be moved to the card. The card is readable by other devices. (another telephone, Mac, PC, digital camera) Content on the bill of fare is non encrypted past default. The menu volition NOT be reformatted when Portable storage is selected. | The SD carte du jour tin can become your device primary storage. Downloaded applications, their data and media tin be moved to the card. The menu is not readable by other devices. (another phone, Mac, PC, digital photographic camera) The carte du jour is always encrypted, and can not be decrypted on any other device. The card will be formatted when Portable storage is selected. |
Performance warning
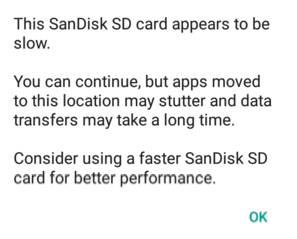
We recommend employ of a high speed card, such as a UHS-i type. Class four and Form two micro SD cards are not recommended for adopted internal storage usage. The performance of these cards is typically 10x slower than internal storage performance.
High speed card are identified by these logos:

If your card it too slow, your device will warn your during the adoption process. If yous encounter this dialog, nosotros advise to upgrade your carte to a UHS-i card first.
Using your card equally "Portable Storage"
- Insert the SD card on your device
- Android volition notify yous a new SD Carte has been detected, y'all can setup the carte du jour as portable or internal storage
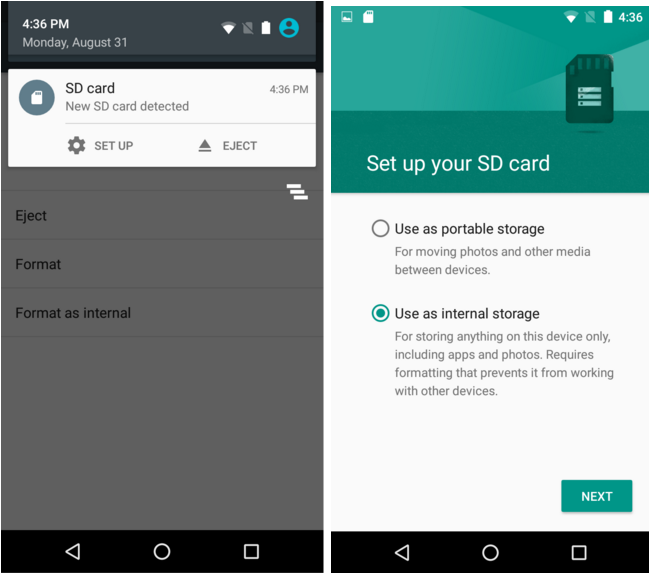
If you determine to defer this conclusion, the bill of fare volition be used as portable storage by default. you can change this option through Settings -> Storage at a later stage
Using your card as "Portable Storage"
- Media, pictures, movies already on the carte du jour will be visible in the device photo gallery and media apps. New content side loaded to the card volition besides be available and viewable in media apps on the device
- Through the Motorola camera application settings, yous tin can select the default storage for pictures and movies captured through the Motorola camera app. Third political party camera might not offer this choice.
- Some 3rd party applications volition enable you to store their content on the 'portable' SD card, as in lollipop; simply only if the application programmer chose to do so (Google Play Music)
- If you select a card equally portable storage, you will Not be able to move applications to the card, nor will play store automatically install applications to this card
Using your card every bit "Internal Storage"
- Insert the card in the device
- Y'all should see a "Set up SD card" Notification
- Tap on 'setup SD carte du jour' in the insertion notification (or become to settings->storage->select card-> carte->format as internal)
- Select the 'internal storage' option, after have carefully read the alert
- If you currently have applications installed on the card, your device volition inquire y'all to move these applications dorsum to internal storage before formatting your carte
- Your card will be formatted and encrypted, and usable as device storage
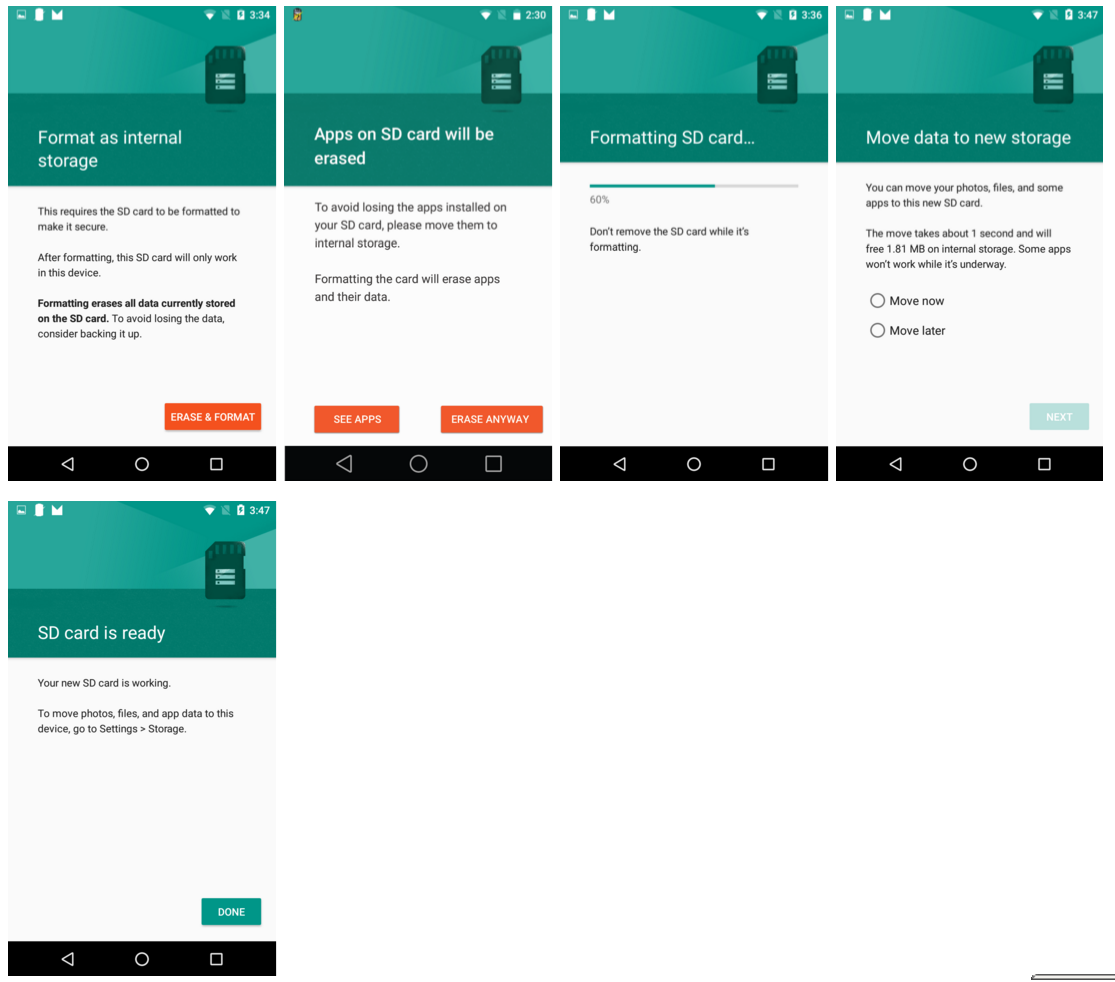
- In one case the card has been formatted, you will be asked whether yous want to migrate data currently on your device to the card. This step will move all media, pictures, and documents to the SD card.
- By selecting where to migrate content, y'all also select the preferred storage location for all applications, databases and data.
- If you decide to movement that data to the carte du jour, the SD carte will also become the preferred storage location for all applications content, information and database and media.
- If you lot determine to skip this stride, your device internal storage will remain the preferred storage for all content.
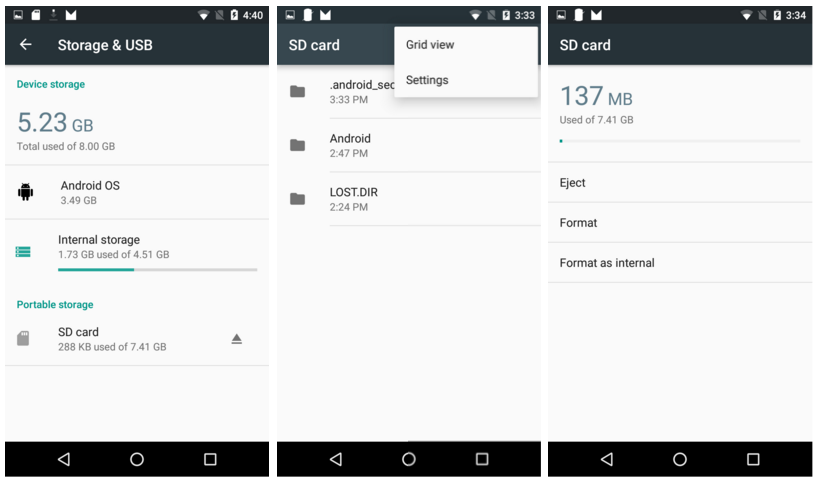
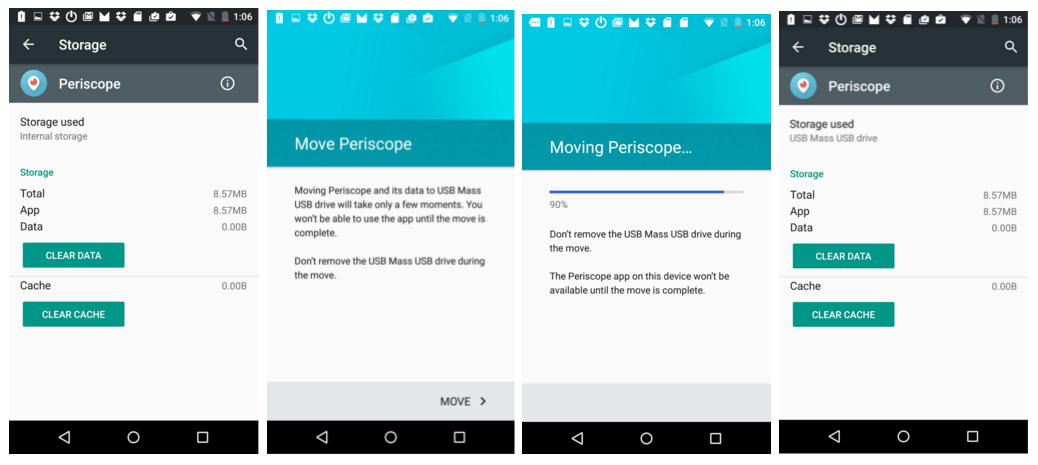
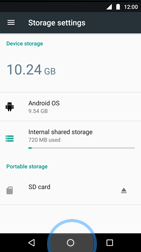
- Once a carte du jour has been formatted as internal storage, both your device internal storage and the carte du jour will bear witness up as "device storage" under storage settings, and you will be able to movement applications which were in internal storage to the card. Moving applications to the menu can exist done from application settings (Settings > Apps > select application > Change storage location)
- Once a menu has been formatted every bit internal storage, Play Store will install applications on either storage book automatically, based on a prepare of rules provided by the application developer (you will be able to motility applications from i volume to another)
Applications volition always store their content in the preferred storage location past default. You will not demand to indicate in each application setting where to store content; for case
SD Menu
Using external SD card equally internal storage

When y'all insert a SD menu for the first time, you can choose to either use the carte du jour as portable storage or internal storage.
The post-obit steps comprise didactics on how to utilise your SD card as internal storage.

Go to the Starting time screen.
Elevate the pointer symbol up.

Curl down.
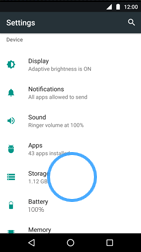
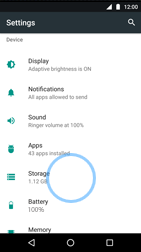
Choose Settings.

Scroll down.
Cull Storage.

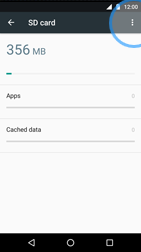
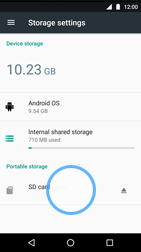
Choose SD card.
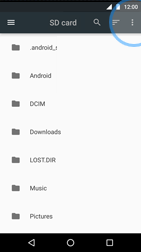
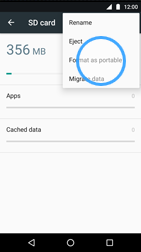
Cull the options symbol.
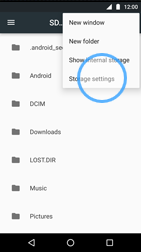
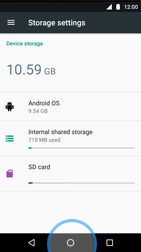
Choose Storage settings.
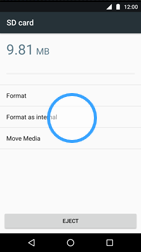
Choose Format as internal.

Choose ERASE & FORMAT.
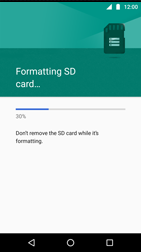
The SD card is now formatting.
Notation: practise not remove the SD card while information technology is beingness formatted.
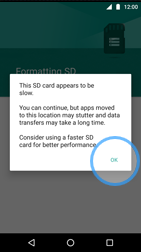
If this screen appears, choose OK.
If this screen does not announced, go to the next step.
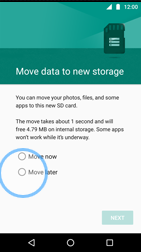
Tick an option, in this case Motion later.
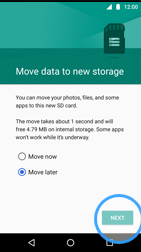
Cull NEXT.
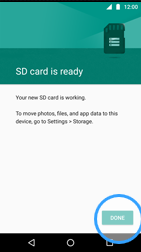
Choose DONE.
The SD card is now formatted as internal storage.
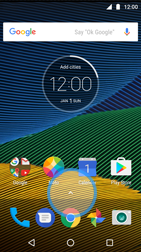
Return to the Start screen.
Using external SD card as portable storage

When you insert a SD card for the starting time time, you can cull to either use the bill of fare as portable storage or internal storage.
The post-obit steps contain teaching on how to utilize your SD card as portable storage.

Go to the First screen.
Drag the arrow symbol upward.

Curl down.
Choose Settings.
Scroll down.
Choose Storage.

Cull SD carte.
Cull the options symbol.
Choose Format as portable.
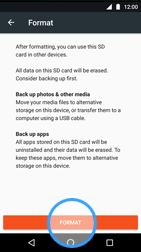
Choose FORMAT.
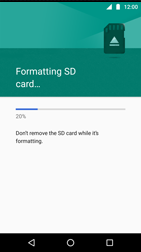
The SD card is now formatting.
Note: do not remove the SD carte du jour while it is being formatted.

Choose DONE.
The SD carte du jour has been formatted equally portable storage.
Render to the Start screen.
Ringtone
Ringtone Settings

The following steps contain instructions on how to set several ringtone settings.

To fix a song as your ringtone on your Motorola Moto G5 Plus, see the link below:
Fix a song equally ringtone
Get to the Outset screen.
Elevate the arrow symbol up.

Scroll down.
Choose Settings.
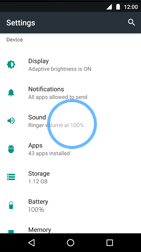
Scroll down.
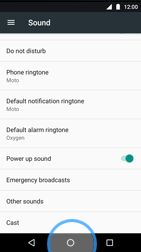
Choose Sound.
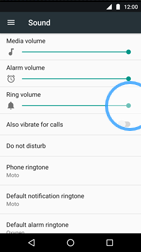
To set the volume, drag the slider under Ring book.
Optional: change the other volume settings.
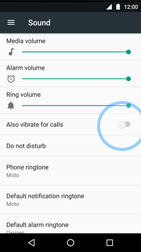
To enable vibration while ringing, enable Likewise vibrate for calls.
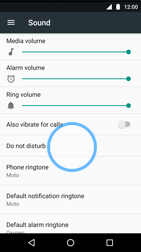
To suit Do not disturb settings, choose Do not disturb and choose an pick.
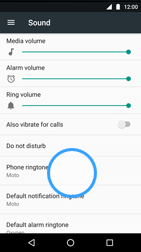
To change the ringtone, cull Phone ringtone.
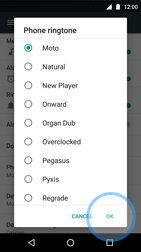
Tick an choice and choose OK.
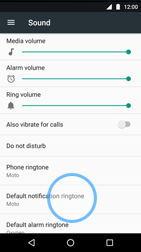
To change the notification ringtone, choose Default notification ringtone.
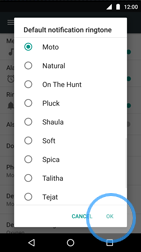
Tick an pick and choose OK.

To adjust other sound settings, choose Other sounds.
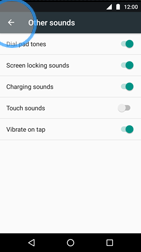
Disable one or more options.
Choose the dorsum symbol.
The sound settings have been configured.
Return to the Start screen.
Reset
Soft reset

In the unlikely effect that your device becomes unresponsive, frozen, blank or black screen, or volition not respond to the ability push button, you can perform a soft reset on the Motorola Moto G5 Plus.
The following steps contain instructions on how to perform a soft reset.
Note: If the device does not restart, endeavour to restore factory settings.
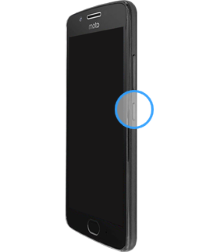
To plow off the Motorola Moto G5 Plus, press and concur the power button on the side of the Motorola Moto G5 Plus.

The Motorola Moto G5 Plus has been turned off.

To turn on the Motorola Moto G5 Plus, printing and concord the ability button on the side of the Motorola Moto G5 Plus.
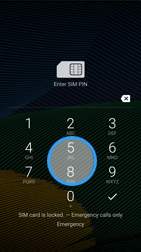
If this screen appears, enter the Pivot lawmaking and cull the tick symbol.
If this screen does not appear, go to the next stride.
If this screen appears, drag the lock symbol up to unlock it.
If this screen does non appear, go to the side by side step.

The Motorola Moto G5 Plus has been rebooted.
External reset

Warning: Earlier proceeding with an External Reset ensure yous know your Gmail accost and password. If you don't know the Gmail address and password, visit world wide web.gmail.com > "Need assistance?".
Once you have reset your password you volition demand to look for approximately 72 hours earlier you lot tin can utilize the new password to unlock the phone. After approximately 72 hours, power up the locked phone in an surface area with Wi-Fi or data service, and enter the new countersign.

If you are unable to access the telephone's bill of fare to perform the standard reset you tin can endeavour an external mill reset.
The following steps contain instructions on how to perform a external factory reset.
If you are unable to admission the telephone'southward menu to perform the standard reset y'all tin can endeavor an external factory reset.
Note: brand sure the battery is sufficiently charged, at least 25% is recommended.
To perform an external reset, the Moto Z Play has to be turned off.

To open the boot menu, press and agree the power button and the volume down on the side of the Motorola Moto G5 Plus.
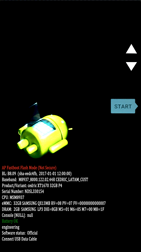
Select RECOVERY Mode past pressing the book down button.
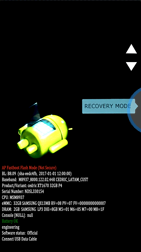
Press the power button.
Press and hold the ability button, then printing and release the volume up button.
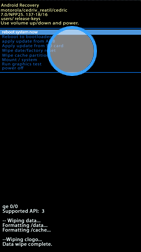
Select Wipe data/factory reset by pressing the volume down button.
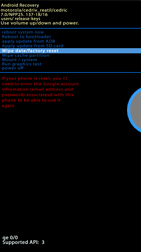
Press the power button.
Select Userdata just by pressing the volume downward button.
Notation: Personalised content merely appears if this is a customised motomaker device. Selecting this option will remove any custom greeting or custom wallpaper installed during the build procedure.

Press the power push.
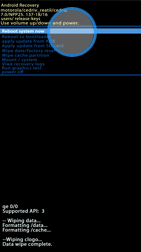
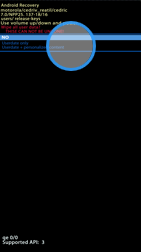
Select Reboot system now and press the power button.

All data and settings saved on the Motorola Moto G5 Plus volition be deleted.
The Motorola Moto G5 Plus volition automatically reset and reboot.
Create a backup of your information

These instructions testify you how to relieve your personal data like photos, music and files to your Google account. This enables yous to restore your data later on switching phones or resetting your device to mill settings.

It's also possible to backup some data to the SD carte du jour or to transfer it to your PC / Mac.

To retrieve your information and settings, just login to your Google business relationship on your new or reset device and your data and settings will be automatically restored.
Make sure you accept a Google account, and so cull Adjacent to begin the backup.

Go to the Kickoff screen.
Drag the arrow symbol up.

Roll downwards.
Choose Settings.

Curl down.
Choose Backup & reset.
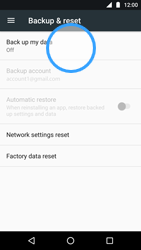
Choose Back upwardly my information.
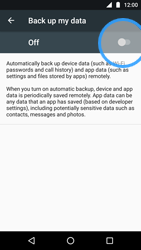
Enable Back up my data.
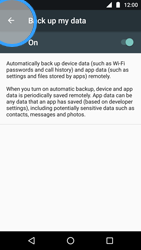
Choose the back symbol.
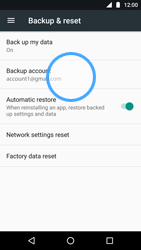
Enable Backup business relationship.
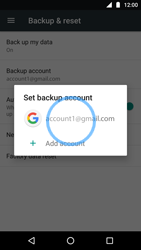
Cull the account you desire to utilize to backup your data.
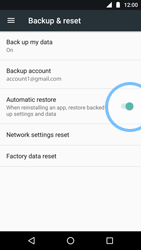
If Automatic restore is disabled, enable Automatic restore.
If Automatic restore is enabled, go to the next stride.
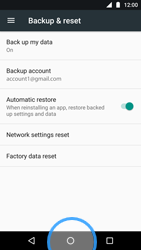
A backup of your personal data will now automatically be stored in your Google account.
Return to the Starting time screen.

Y'all can now perform a factory reset without the chance of losing your personal data.
Go to Reset device to factory settings for instructions on how to perform a mill reset.
Later on a factory reset, your personal data volition automatically be restored on your Motorola Moto G5 Plus.
Network
Manually select a network

The following steps contain instructions on how to manually select a network.
Become to the Beginning screen.
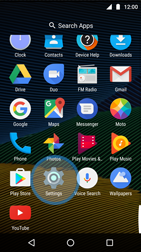
Drag the arrow symbol upward.
Curl downwards.
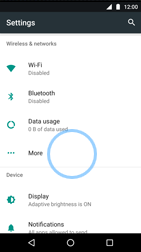
Choose Settings.
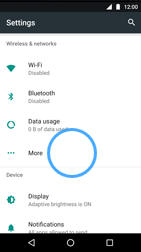
Choose More.
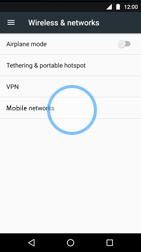
Choose Mobile networks.
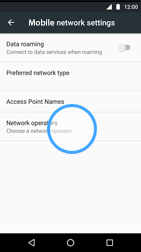
Choose Network operators.
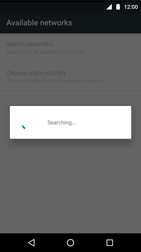
The Motorola Moto G5 Plus is now searching for bachelor networks.
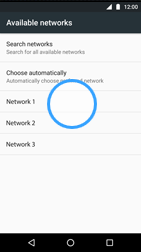
Choose the desired network.
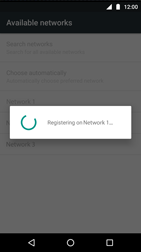
The Motorola Moto G5 Plus will connect to the selected network.
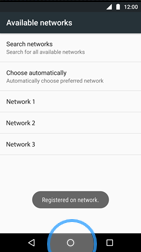
The Motorola Moto G5 Plus has been logged onto the selected network.
Return to the Start screen.
Modify network mode

The following steps incorporate instructions how to alter the network to 3G or 2G, which could help to conserve battery ability.

Get to the Start screen.
Elevate the pointer symbol up.
Gyre downwards.
Cull Settings.
Choose More than.

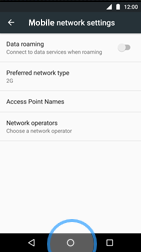
Choose Mobile networks.
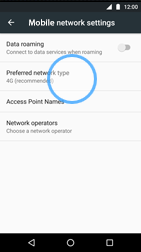
Choose Preferred network type.
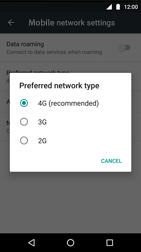
Tick 2G.
The Motorola Moto G5 Plus has been set to the lowest possible network style.
Render to the Kickoff screen.
Wi-Fi
Connect to a Wi-Fi network

In improver to mobile internet your Motorola Moto G5 Plus can also utilize a Wi-Fi connection.
The following steps contain instructions on how to connect to Wi-Fi network.
Go to the Showtime screen.
Drag the arrow symbol upwardly.
Scroll down.
Choose Settings.
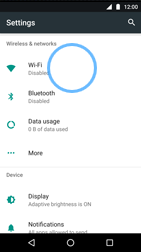
Choose Wi-Fi.
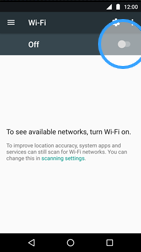
Enable Wi-Fi.
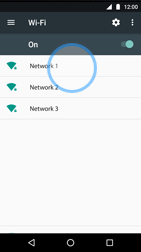
All available wireless networks within range of your Motorola Moto G5 Plus are listed.
Choose the network to which you want to connect.
If the network is non listed, make sure that the network is enabled and inside the range of the Motorola Moto G5 Plus.
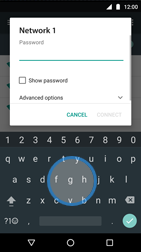
If this screen appears, enter the password and choose CONNECT.
If this screen does not appear, become to the adjacent step.
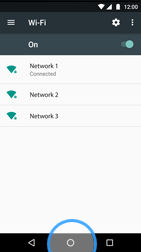
The Motorola Moto G5 Plus is now connected to the Wi-Fi network.
Return to the Start screen.
Cyberspace
Browse the net

Specific settings are needed to employ mobile cyberspace. If necessary, see Manual configuration for instructions.
The following steps incorporate instructions on how to utilise the internet browser of the Motorola Moto G5 Plus.

Become to the Start screen.
Elevate the arrow symbol upwards.

Choose Chrome.
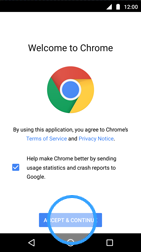
If this screen appears, read the terms and atmospheric condition and choose ACCEPT & CONTINUE.
If this screen does not announced, skip the next step.
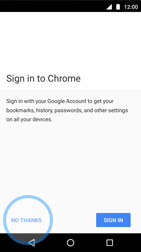
Choose an option, in this example NO, THANKS.
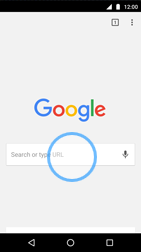
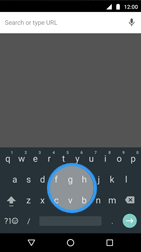
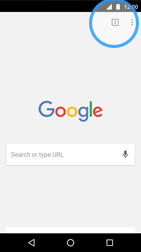
This is the start folio of the browser.
To navigate to a web accost, choose Search or type URL.
Enter http://www.google.com/ and choose the arrow symbol on the correct-hand side.
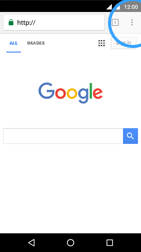
The spider web page has been loaded.
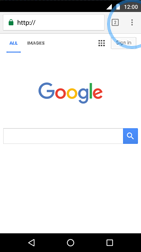
Choose the options symbol.
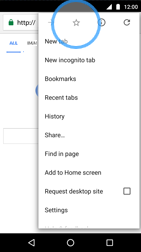
To bookmark this page, choose the star symbol.

If this screen appears, choose EDIT.
If this screen does not appear, go to the next footstep.
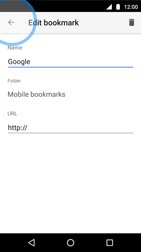
Optional: modify the name under Name.
Choose the back symbol.

The web page has been bookmarked.
Cull the options symbol.
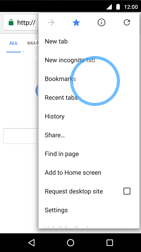
To view the bookmarks, choose Bookmarks.
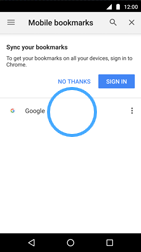
All saved bookmarks are displayed hither.
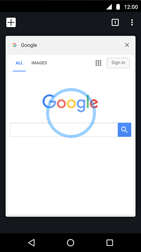
Choose Google.
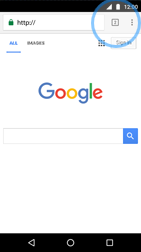
The bookmark has been loaded.
Choose the options symbol.
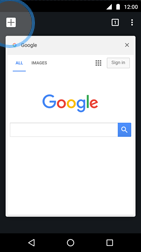
Choose the plus symbol.
The new tab has been loaded.
Choose the tabs symbol.
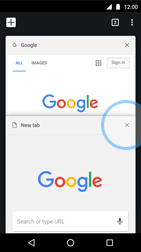
To close a tab, choose the cross symbol.
The tab has been closed.
To open a tab, choose the tab.
The tab has been loaded.
Cull the options symbol.
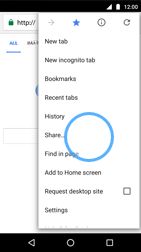
To share the electric current folio, choose Share…
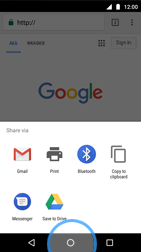
Choose an option.
To cease using the internet and return to the Start screen, cull the home symbol.
Camera
Using the photographic camera

The following steps contain instructions on how to use the photographic camera on your Motorola Moto G5 Plus.
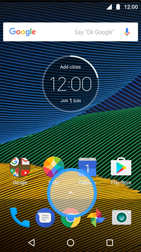
Go to the Start screen.
Drag the pointer symbol up.
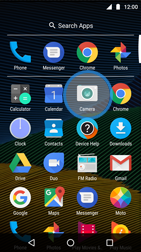
Cull Camera.
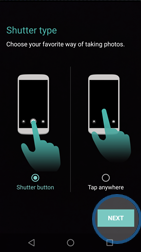
If this screen appears, tick an choice and choose Side by side.
If this screen does not appear, skip the side by side steps.
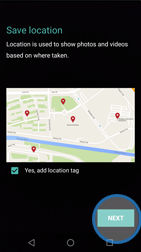
Optional: untick Aye, add location tag.
Choose NEXT.
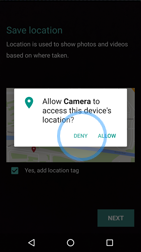
Choose an selection, in this case DENY.
Choose NEXT.
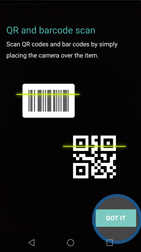
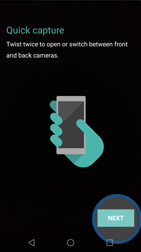
Choose GOT IT.
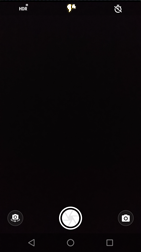
To zoom in or out, make a compression gesture on the screen.
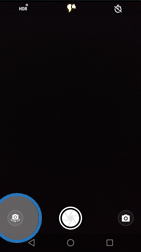
Scroll to the left.
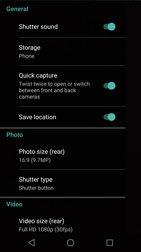
The camera settings can be inverse in this screen.
Ringlet to the right.
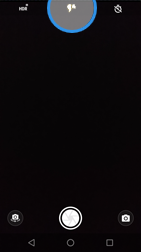
To change the wink settings, choose the flash symbol.
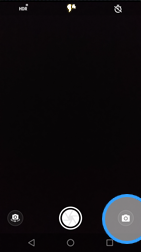
To switch between camera and video mode, choose the camera symbol and choose Video.
To switch between the front and back camera, cull the camera switch symbol.
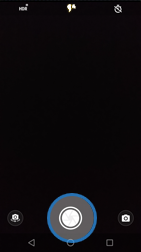
To accept a motion picture, choose the shutter symbol.
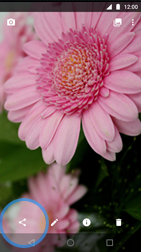
Scroll to the correct.
To share the picture, choose the share symbol.
Choose an option
Return to the Offset screen.

Tip: To enable all features and get optimized performance, visit the Play Store to ensure you are running the latest version of Motorola Camera.
Calls
Enable call waiting

The following steps contain instructions on how you tin can enable call waiting on your Motorola Moto G5 Plus.

Go to the Offset screen.
Drag the arrow symbol upward.

Scroll down.
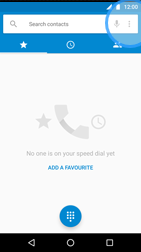
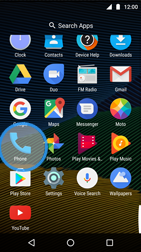
Choose Telephone.
Choose the options symbol.
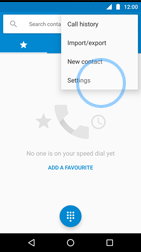
Choose Settings.
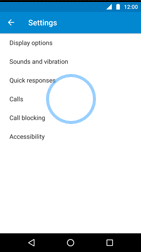
Choose Calls.
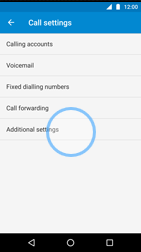
Choose Additional settings.
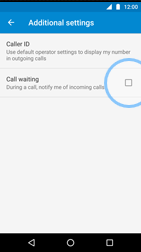
Tick Call waiting.
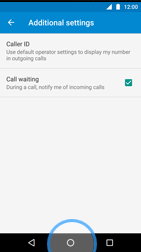
Call waiting has been enabled.
Return to the First screen.
Enable call forwarding

The following steps comprise instructions on how you can enable call forwarding on your Motorola Moto G5 Plus.

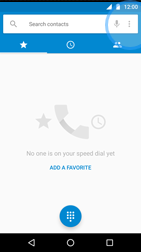
Go to the Start screen.
Elevate the arrow symbol up.
Scroll downward.
Cull Phone.
Choose the options symbol.
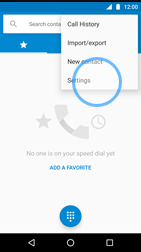
Choose Settings.
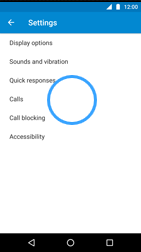
Choose Calls.

Cull Call forwarding.

Choose Always forward.
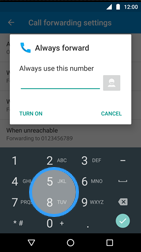
Enter the phone number you would similar to forward your calls to, and choose Plow ON.
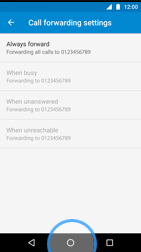
Call forwarding has been enabled.
Return to the Beginning screen.
Bluetooth
Pairing using Bluetooth

To connect your Motorola Moto G5 Plus to another Bluetooth device, such equally a headset, automobile kit or laptop; you will demand to configure a few simple settings.
Our tutorial shows you how to pair your Bluetooth devices for the first fourth dimension and gives you tips on solving Bluetooth connectedness problems.

Earlier you beginning, make certain you fully charge both your Bluetooth devices.
Note: Your other Bluetooth device may require a PIN code for pairing. In this case, check for the code in the device'south manual.
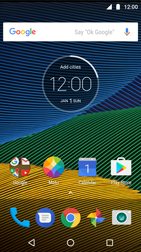
Go to the Start screen.
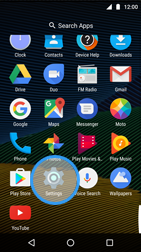
Elevate the pointer symbol up.

Scroll down.
Cull Settings.
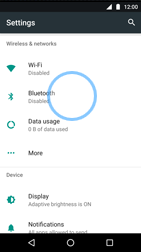
Cull Bluetooth.
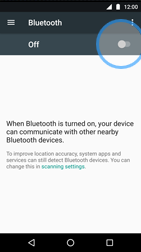
Enable Bluetooth.
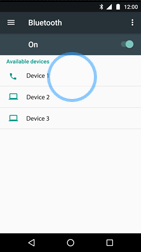
If i or more than Bluetooth devices are bachelor inside the Motorola Moto G5 Plus'southward range, they will be listed.
Choose the device that you desire the Motorola Moto G5 Plus to connect to.
If the device is not listed, make sure that Bluetooth has been enabled on the device and that it is within range of the Motorola Moto G5 Plus.

If this screen appears, verify the code and choose PAIR.
If this screen does non announced, enter the Pin code of the selected Bluetooth device and cull PAIR. This code tin can be plant in the manual of the selected Bluetooth device (usually 0000 or 1234).
The connection will be made.
Notation: Please also follow the instructions on the other device.
The pairing has been completed.
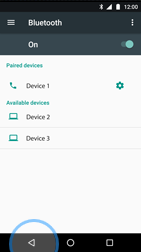
If you are nonetheless unable to pair, you might want to reset the Bluetooth settings on your Motorola Moto G5 Plus.
To practice this, choose the dorsum symbol.

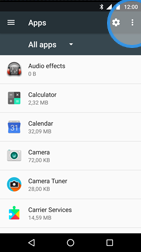
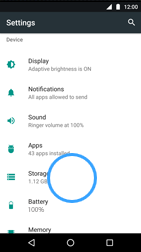
Gyre down.
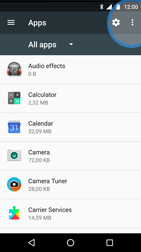
Choose Apps.
Choose the options symbol.
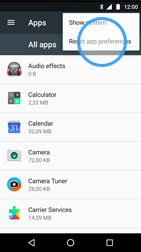
Choose Reset app preferences.
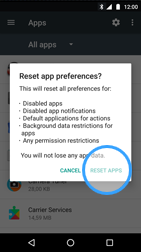
Choose RESET APPS.
Choose the options symbol.
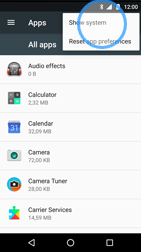
Choose Evidence system.
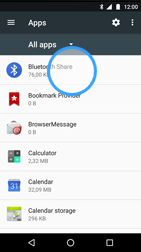
Gyre down.
Choose Bluetooth Share.
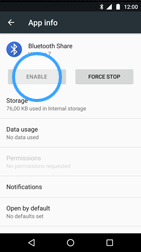
If this screen appears, cull ENABLE.
If this screen does not announced, get to the next pace.
Yous have just reset the Bluetooth settings of your Motorola Moto G5 Plus
Please re-enable and outset pairing your Bluetooth devices again.
Note: Did this resolve your problem? If not, perform a factory reset to restore Bluetooth.
Data
Transfer data from the device to the SD card

The following steps contain teaching on how yous can transfer data from your phone to your SD bill of fare.

Go to the Start screen.
Drag the arrow symbol up.
Curl downwards.
Choose Settings.
Scroll downwardly.
Choose Storage.
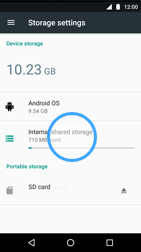
Choose Internal shared storage.

Roll downwardly.
Choose Explore.
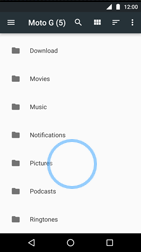
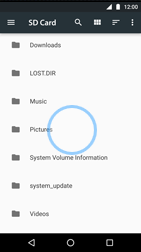
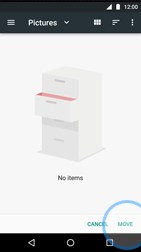
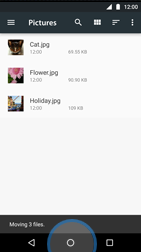
Navigate to the folders or files that you want to copy to the SD card, in this case, ringlet downwardly and choose Pictures.
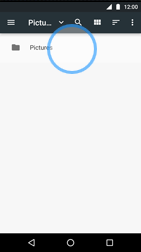
Cull Pictures.

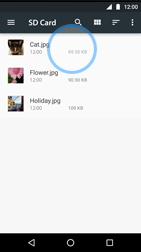
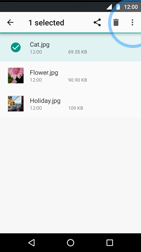
Cull and hold a picture.
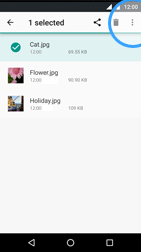
Choose the options symbol.
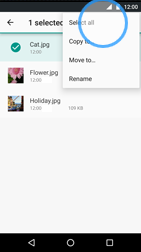
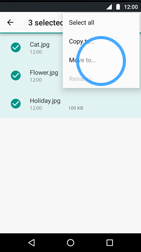
Cull Select all.
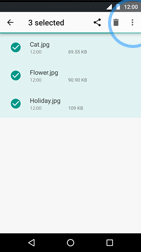
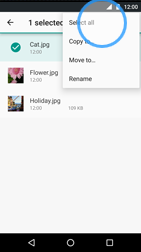
Choose the options symbol.
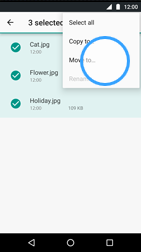
Cull Move to…
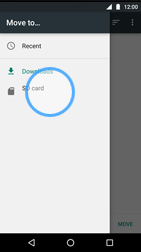
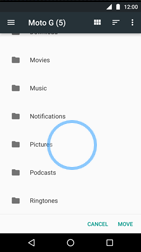
Choose SD card.
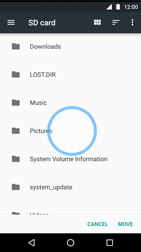
Navigate to the location that you lot want to copy the folders or files to, in this example cull Pictures.
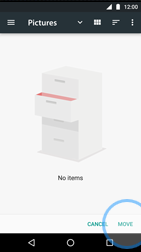
Choose Motion.
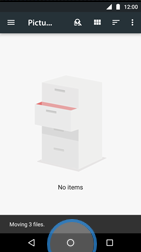
The folders or files have been moved.
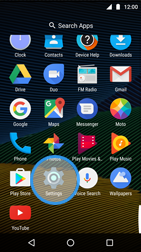
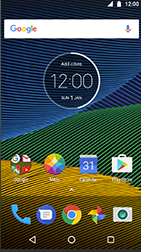
Return to the Start screen.
Transfer data from the SD card to the device

The post-obit steps contain instruction on how yous tin can transfer data from your SD card to your telephone.

Become to the Beginning screen.
Drag the arrow symbol upwards.
Whorl down.
Choose Settings.
Roll downward.
Choose Storage.
Cull SD bill of fare.
Navigate to the folders or files that you lot desire to motility to the retentivity of the device, in this case, scroll downwards and choose Pictures.
Choose and hold a picture.
Choose the options symbol.
Cull Select all.

Cull the options symbol.
Cull Movement to…

Choose Moto One thousand (5).
Navigate to the location that you want to motility the folders or files to, in this case, coil down and choose Pictures.
Choose MOVE.
The folders or files have been moved.
Return to the Start screen.
Transfer information from phone to computer (PC)

To transfer data from your telephone to your Windows PC, please click here.
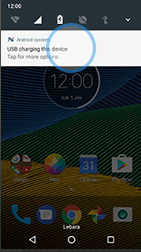
Connect the Motorola Moto Z2 Play with PC using the USB cable.

Drag the status bar down.

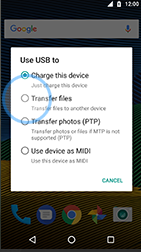
Choose USB charging this device.

Cull an pick, in this case Transfer files.
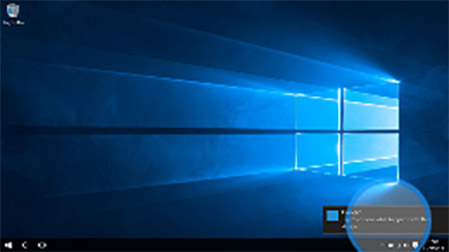
Choose your Motorola Moto Z2 Play on the desktop.
Choose Open device to view files.
To transfer files from your Motorola Moto Z2 Play to your computer, choose Internal storage.
You are now able to duplicate or motion the files from folders on the Motorola Moto Z2 Play to the desired location on your computer.

If you were unable to connect your phone to your calculator, delight check our troubleshooter.
Transfer information from telephone to computer (Mac)

To transfer information from your phone to your Mac, please click here.

Connect the Motorola Moto G5 Plus with Mac using the USB cable.
Elevate the status bar down.
Choose USB for charging.
Tick Transfer photos (PTP).
Photos will exist opened automatically.
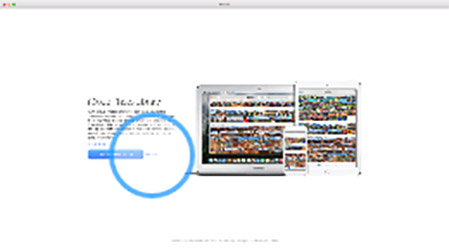
If this screen appears, choose an option, in this case Not now.
If this screen does not appear, go to the side by side step.
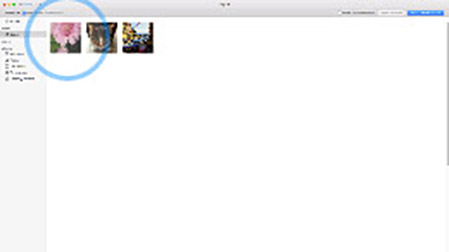
Choose one or more pictures.

Cull Import All New Photos.
The pictures have been transfered from the Motorola Moto G5 to your computer.

If you lot were unable to connect your telephone to your computer, delight bank check our troubleshooter.
Device
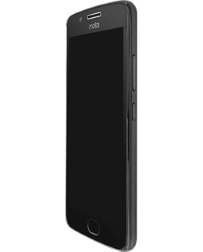
Insert or remove the SIM card – Moto G5 Plus
1. With the phone facing downwardly, insert the SIM tool into the tray hole to pop out the tray.

2. Put in the SIM menu with the gold contacts facing up. Put in an optional microSD menu on the tray'due south back.
3. Button the tray back into your phone.
Full general
Icon notifications
![]()
The post-obit steps contain an explanation of the about common icon notifications for the Motorola Moto G5 Plus.
![]()
Note that many applications can add their own icons to the notifications tray.
![]()
Network strength.
![]()
Wi-Fi in range/connected.
![]()
Bluetooth on/connected.
![]()
Airplane mode.
![]()
Bombardment charging/full.
![]()
Do not disturb.
![]()
Vibrate.
![]()
Priority.
![]()
Alarm ready.
![]()
Warning.
![]()
NFC enabled.
![]()
Roaming enabled.
Setup email
Cull your email provider
– Gmail
– Outlook.com
– Yahoo!
Gmail

The following steps incorporate instructions on how to configure Gmail on your Motorola Moto G5 Plus.

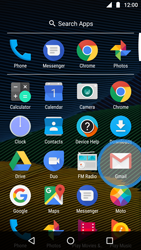
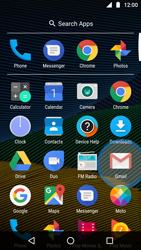
Get to the Offset screen.
Drag the arrow symbol up.
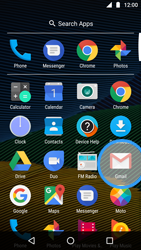
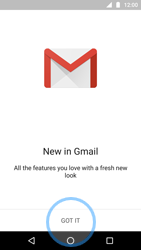
Choose Gmail.
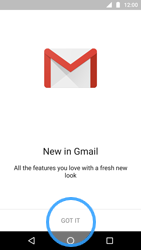
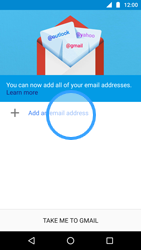
If this screen appears, choose an pick, in this example GOT IT.
If this screen does not appear, skip the adjacent stride.
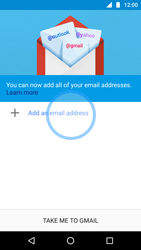
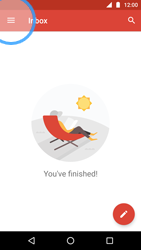
Choose Add an email address.

If this screen appears, choose the listing symbol. Cull your due east-mail account and and then Add account.
If this screen does not appear, go to the side by side step.
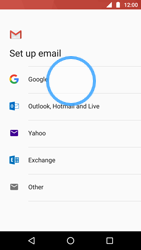
Cull Google.
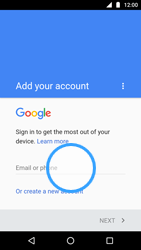
Choose Email or phone and enter your email address
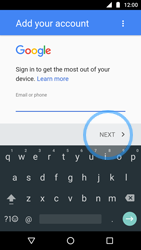
Cull NEXT.
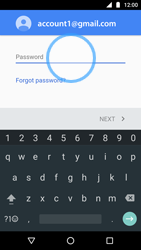
Cull Password and enter the password of your email account
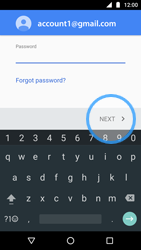
Choose NEXT.
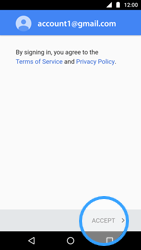
Read the terms and atmospheric condition and choose Take.
Gyre down.
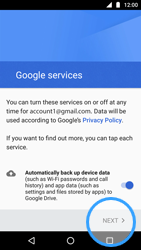
Optional: disable Automatically back up device information.
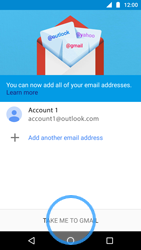
Choose NEXT.
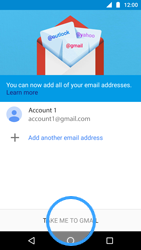
Choose Take ME TO GMAIL.

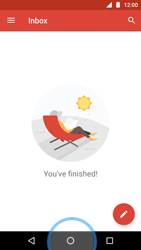
The e-mail account has been configured and is ready for use.
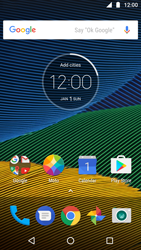
Return to the Starting time screen.
Outlook

The following steps contain instructions on how to configure Outlook.com on your Motorola Moto G5 Plus.

Go to the Start screen.
Elevate the arrow symbol upward.
Scroll down.
Choose Gmail.
If this screen appears, choose GOT IT.
If this screen does not appear, skip the side by side step.

Cull Add together an e-mail accost.
If this screen appears, choose the list symbol. Choose your email account and then Add business relationship.
If this screen does not appear, become to the next step.
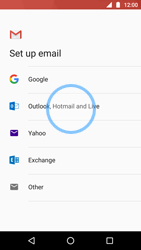
Cull Outlook, Hotmail and Live..
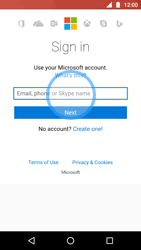
Choose Email, phone,or Skype name and enter your email address
Choose Next.
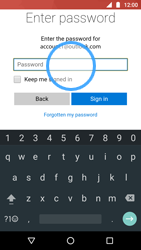
Scroll down.
Choose Password and enter the countersign of your email account
Choose Sign in.
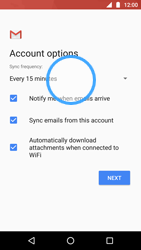
Under Sync frequency, cull an choice.
Optional: untick 1 or more options.
Choose Adjacent.
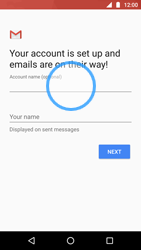
Nether Account name (optional), enter Outlook.com
Choose Your name and enter your proper name
Cull NEXT.
Cull TAKE ME TO GMAIL.
The email business relationship has been configured and is ready for utilize.
Return to the Start screen.
Yahoo

The following steps comprise instructions on how to configure Yahoo! on your Motorola Moto G5 Plus.

Go to the Kickoff screen.
Drag the arrow symbol upward.
Scroll down.
Cull Gmail.

If this screen appears, cull GOT Information technology.
If this screen does not appear, skip the side by side pace.
Choose Add an e-mail address.

If this screen appears, cull the list symbol. Choose your email account and then Add together account.
If this screen does not appear, go to the next step.
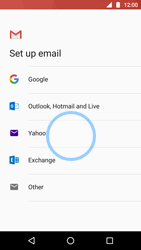
Choose Yahoo..
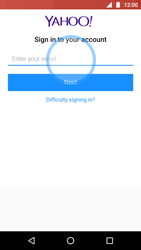
Choose Enter your email and enter your e-mail address
Choose NEXT.

Choose Countersign and enter the password of your electronic mail account
Choose Sign in.
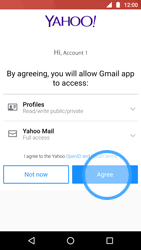
If this screen appears, cull Agree.
If this screen does not announced, go to the next footstep.
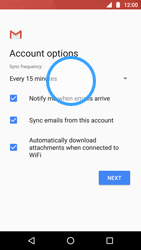
Under Sync frequency, choose an option.
Optional: untick one or more options.
Cull NEXT.
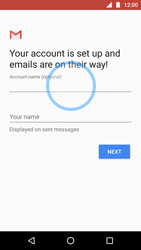
Under Account proper noun (optional), enter Yahoo!
Choose Your proper name and enter your name
Cull Next.
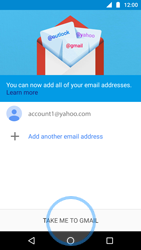
Choose Take ME TO GMAIL.
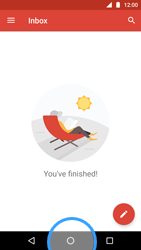
The e-mail business relationship has been configured and is ready for use.
Render to the Outset screen.
Applications
How to download
A Google account is required to download applications to your Motorola Moto G5 Plus.
The following steps comprise instructions on how to search and install applications.

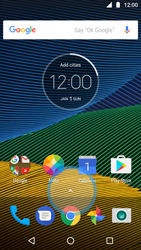
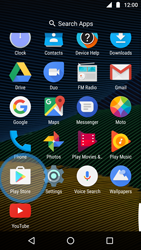
Go to the Commencement screen.
Drag the arrow symbol up.
Scroll down.
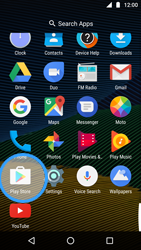
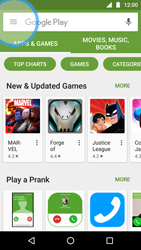
Choose Play Shop.
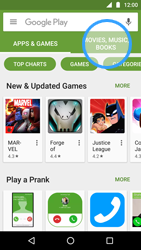
This is the start page of the Play Store. Recommended applications and special categories are displayed here, for example APPS & GAMES and MOVIES, MUSIC, BOOKS.
Choose MOVIES, MUSIC, BOOKS.
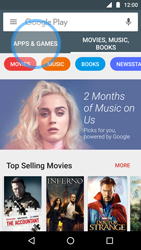
This is the Entertainment showtime page. Recommended entertainment and special categories are displayed here, for example MOVIES.
Choose APPS & GAMES.
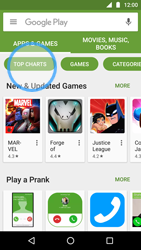
Cull TOP CHARTS.
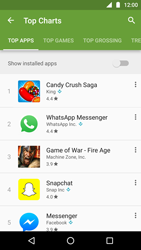
Under Superlative APPS, the top free applications are displayed.
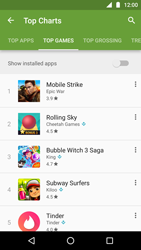
Scroll to the right.
Nether TOP GAMES, the pinnacle games are displayed.
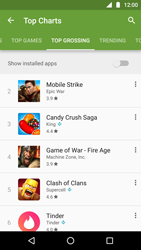
Scroll to the correct.
Under TOP GROSSING, the top grossing applications are displayed.
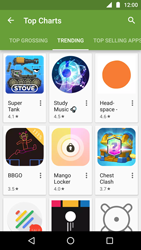
Scroll to the right.
Under TRENDING, the top trending applications are displayed.
Roll to the right.
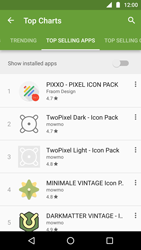
Under Summit SELLING APPS, the summit paid applications are displayed.
Scroll to the right.
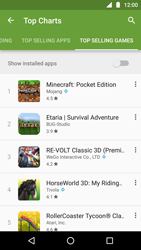
Under TOP SELLING GAMES, the peak paid applications are displayed.

To search for an application, cull the magnifying glass symbol.
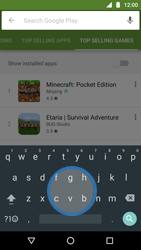
Enter a search key, in this instance Aroused Birds.
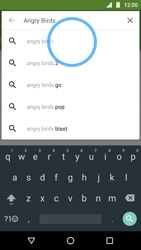
From the list of suggestions, choose Angry Birds.
If this pick is non bachelor, choose the magnifying drinking glass symbol.
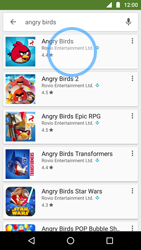
Cull Angry Birds.
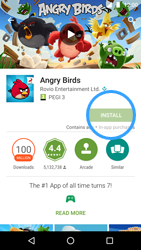
To download and install this (free) awarding, choose INSTALL.
In the instance of a paid application, choose the price tag.

The application has been installed.
To open the application, choose OPEN.
To remove the application, choose UNINSTALL.
Return to the Start screen.
Change app update settings

The following steps comprise instructions on how you modify the settings for updating apps automatically.
Become to the Starting time screen.
Drag the arrow symbol upward.
Scroll downward.
Cull Play Shop.
Cull the list symbol.
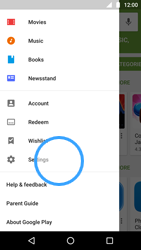
Scroll downward.
Cull Settings.
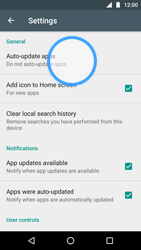
Choose Motorcar-update apps.
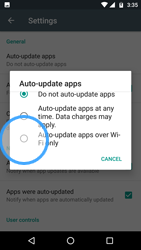
Scroll down.
To only permit application updates via Wi-Fi, tick Motorcar-update apps over Wi-Fi only.
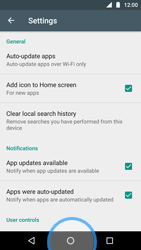
Application updates volition only be performed via Wi-Fi.
Render to the Start screen.
Check data usage per app

The post-obit steps comprise instructions where you can observe the data usage per app.

Become to the Start screen.
Elevate the arrow symbol up.
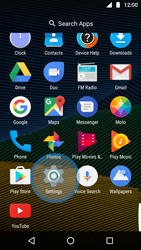
Scroll down.
Choose Settings.
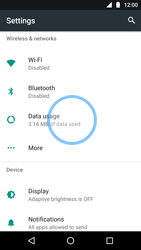
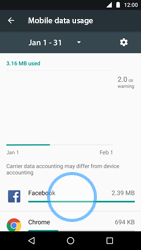
Choose Data usage.
Scroll down.
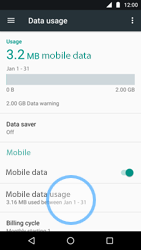
Choose Mobile data usage.
Roll downwards.
Information usage per app is displayed here.
Cull an application, in this case Facebook.
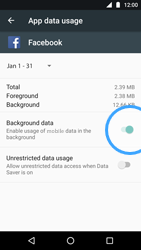
Data usage of the app is displayed hither.
To disable data usage in the background, disable Background data.
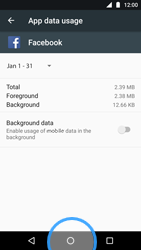
The app will now no longer apply information in the groundwork.
Return to the Outset screen.
- Moto G5S Plus – User guide
Become IN TOUCH
Get support by phone, chat, email or through video communication.
Our Support Team is available Monday - Friday from 10AM to 7PM ET.
Postal service
RAZ Mobility
1934 Sometime Gallows Rd. Suite 350
Tysons Corner, VA 22182
Source: https://www.razmobility.com/support/moto-g5s-plus/
0 Response to "Moto G Plus 5 Not Reading Sim Card"
Post a Comment